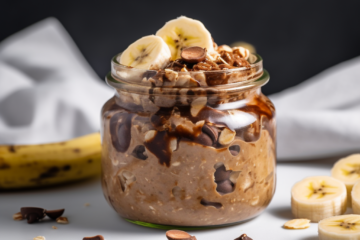
Deliciously Easy Banana Nut Muffins Recipe
Welcome to your new favorite baking adventure! If you’re on the hunt for a delightful treat that combines the sweetness of ripe bananas with the crunch of nuts, look no further than this Banana Nut Muffins Recipe. This blog post will take you through the delightful journey of making these scrumptious muffins, exploring their origins, providing you with a simple recipe, and answering frequently asked questions. Let’s dive right in!
The Origins of Banana Nut Muffins
Banana muffins have a storied history that traces back to the 1930s in the United States. As baking powder became more widely available, home bakers began experimenting with quick bread recipes to make easier and quicker versions of traditional bread. Bananas, being a popular fruit in American households, were often used in these recipes as they provided natural moisture and sweetness. The addition of nuts—usually walnuts—was a flavorful way to add texture and depth to the muffins, leading to the creation of the banana nut muffin, a staple in many cafes and bakeries today. Over the years, variations have popped up, including chocolate chip, blueberry, and even vegan versions, but the classic banana nut muffin remains a beloved option for breakfast, snacks, or dessert.
Ingredients for Banana Nut Muffins
Here’s what you’ll need to whip up a batch of these tasty muffins, perfect for serving 4-6 people:
| Ingredient | Amount |
|---|---|
| Ripe bananas | 2-3 medium |
| Granulated sugar | ¾ cup |
| Egg | 1 large |
| Vegetable oil or melted butter | ⅓ cup |
| Vanilla extract | 1 teaspoon |
| All-purpose flour | 1 ½ cups |
| Baking soda | 1 teaspoon |
| Salt | ¼ teaspoon |
| Chopped walnuts (or nuts of your choice) | ½ cup |
Step-by-Step Directions
Now that you have your ingredients ready, let’s get started on making these delightful Banana Nut Muffins.
Step 1: Preheat the Oven
Preheat your oven to 350°F (175°C). This is essential for ensuring that your muffins rise properly and bake evenly.
Step 2: Prepare the Muffin Pan
Line a muffin tin with paper liners or grease it lightly with cooking spray to prevent the muffins from sticking.
Step 3: Mash the Bananas
In a large mixing bowl, mash the ripe bananas with a fork or masher until smooth. You can leave some chunks for added texture if you prefer.
Step 4: Mix Wet Ingredients
Add the sugar, egg, oil (or melted butter), and vanilla extract to the mashed bananas. Mix well until everything is combined.
Step 5: Combine Dry Ingredients
In a separate bowl, whisk together the flour, baking soda, and salt. This helps distribute the baking soda evenly throughout the flour, ensuring a uniform rise.
Step 6: Combine Wet and Dry Ingredients
Gradually fold the dry ingredients into the wet mixture, being careful not to overmix. Stir until just combined.
Step 7: Add Nuts
Gently fold in the chopped walnuts or nuts of your choice. Again, avoid overmixing to keep the muffins light and fluffy.
Step 8: Fill the Muffin Pan
Evenly distribute the batter into the prepared muffin tin, filling each cup about ¾ full to allow space for rising.
Step 9: Bake
Bake in the preheated oven for 18-22 minutes or until a toothpick inserted in the center comes out clean. The tops should be golden brown.
Step 10: Cool and Enjoy
Once baked, remove the muffins from the oven and let them cool in the tin for about 5 minutes before transferring them to a wire rack to cool completely. Enjoy them warm, or store them in an airtight container for later!
Frequently Asked Questions (FAQs)
Q1: Can I use frozen bananas for this recipe?
Absolutely! Frozen bananas can work wonderfully in this recipe. Just make sure to thaw them completely before mashing. They tend to be mushier, which is perfect for muffins!
Q2: What can I substitute for walnuts?
If you’re not a fan of walnuts or if you have a nut allergy, you can easily substitute with chocolate chips, pecans, or even dried fruits like raisins or cranberries for added sweetness and texture.
Q3: How can I store the muffins?
Store the muffins in an airtight container at room temperature for up to 3 days. If you want them to last longer, you can freeze them for up to 3 months. Just be sure to wrap them individually in plastic wrap and place them in a freezer-safe bag.
Conclusion
Now that you have a complete Banana Nut Muffins Recipe at your fingertips, it’s time to start baking. Whether you plan to serve them for breakfast, as a snack, or bring them to a gathering, these muffins are sure to impress! Happy baking, and don’t forget to share your delicious creations with friends and family!


